Ultrasound guided injection training tips
Rob Mast, Advanced Practice Physiotherapist and MSK Sonongrapher
We have run our ultrasound guided injection training courses for several years and wanted to provide some top ultrasound guided injection training tips on how to perform these techniques. It is a tough skill to develop, so practical experience is key. We have plenty of other resources regarding guided injections here. There are however some things you can do to try and help yourself.
Ensure optimal ergonomic set up
- Appropriate height of the plinth ensures that prior to the injection the patient or region to inject is close to the injector.
- Ensure that the ultrasound screen is in the same field of view as the body part that is being injected.
Needle visualisation
- Aim to maintain continuous real time visualisation of the needle tip in relation to the target and the surrounding structures.
- To prevent movement of the transducer relative to the needle trajectory, anchor the hand holding the transducer. (Figure 1)
- Transducer control can be improved by supporting the elbows or forearms on the table (Figure 2)
- Make sure to visualise the short end of the transducer (Figure 3) so that the needle is easily seen when inserted.
- Take a bird's eye view of the transducer with the needle in the plane of the transducer to make sure that the needle is advanced along the entire footprint of the transducer. This will help to minimise cross cut artefact.
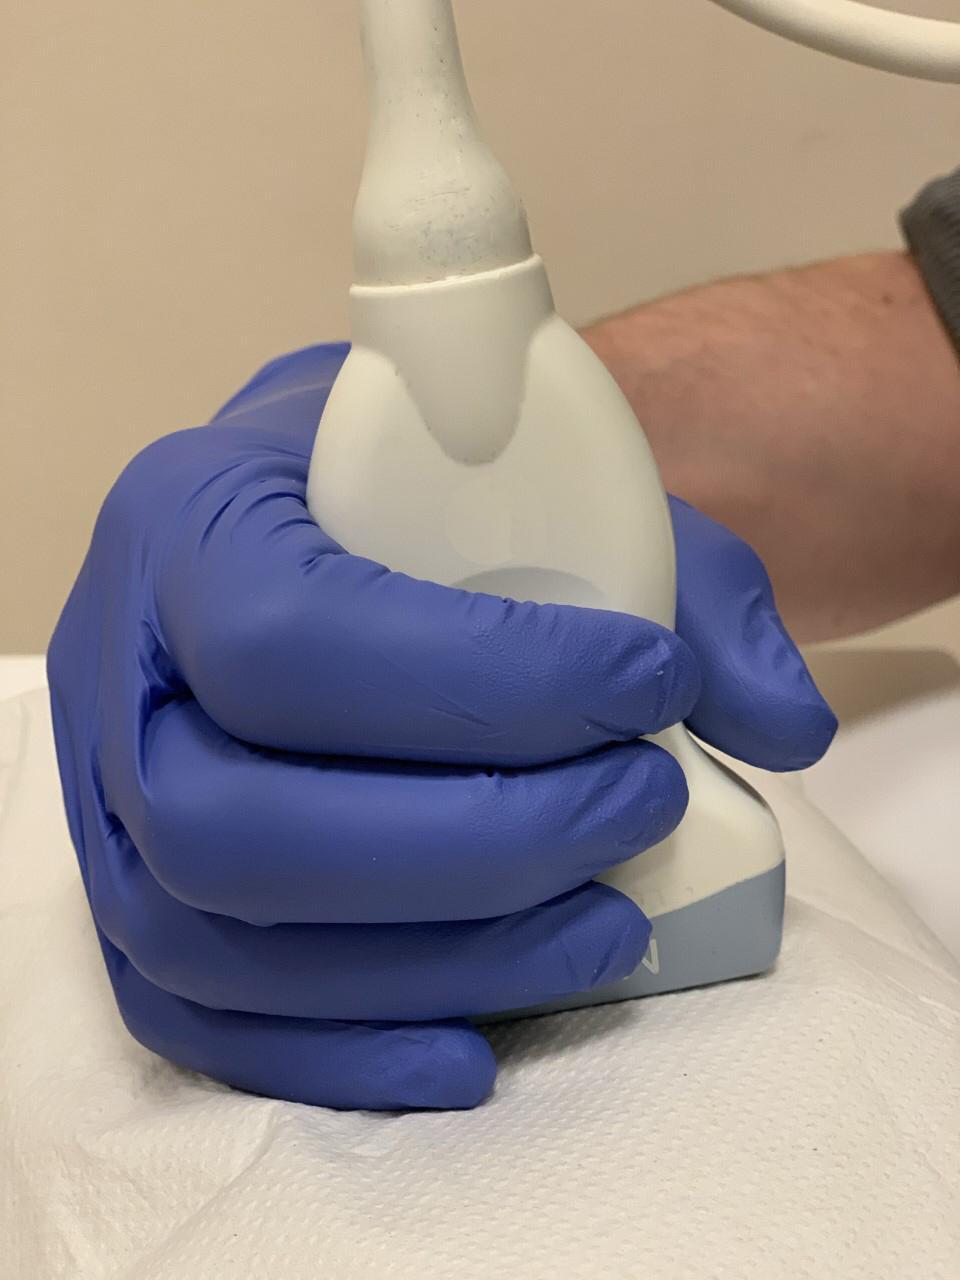
Figure 1 : Anchor hand and elbow to provide stability
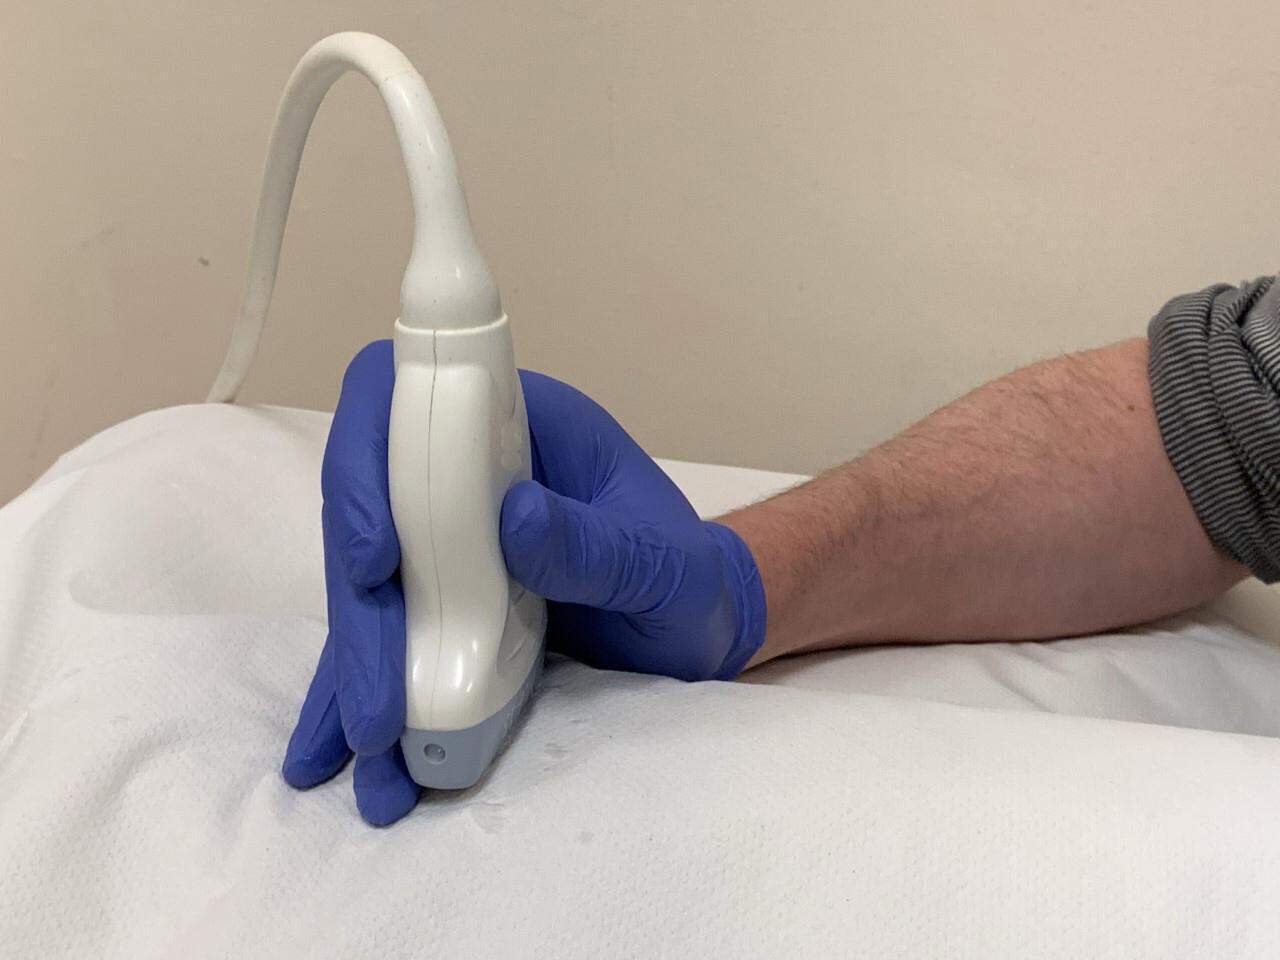
Figure 2: Utilising elbow support to stabilise the probe position
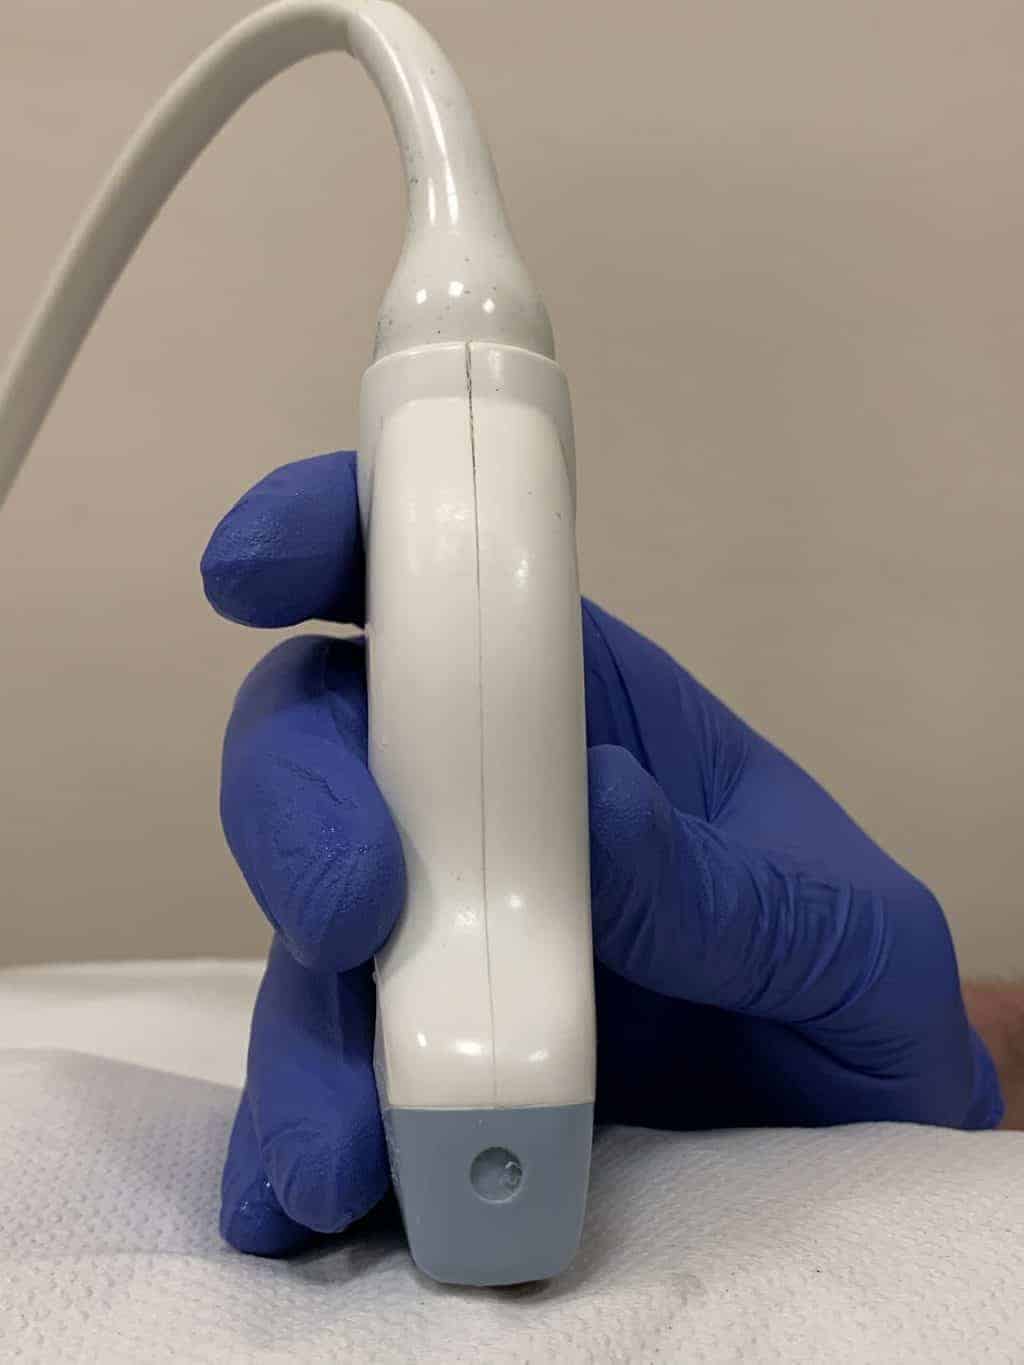
Figure 3: Visualise clearly the short end of the ultrasound probe, so you can enter the needle in the midpoint.

Figure 4: Utilising sterile gel standoff
Specific techniques to optimise visualisation
Fishtailing
- To make sure that the entire needle is visible before advancing the needle further keep the transducer still when the needle is visible then intermittently rotate the other end of the probe from left to right. Stop when the entire needle is completely visualised.
Heel to toe manoeuvre
- With a steep needle trajectory consider improving the angle by pushing one end of the transducer (the part of the transducer that is furthest away from the needle) into the soft tissue in order for the transducer to be more parallel to the needle improving visualisation of the needle. See Video 1 below.
Ultrasound gel used as standoff
- Sterile Ultrasound gel can be used to visualise the needle trajectory even before entering the skin. Sometimes the target structure is so superficial or at such a steep angle that it is difficult to adequately visualise the needle.
- Method: One end of the probe has a mound of gel whilst the other end of the probe is anchored on the skin. The needle is now introduced either through the gel or just proximal to it (Figure 4).
Injecting away from the probe
- When injecting it is possible to get a more parallel needle position by inserting the needle at a distance away from the probe but in plane with the probe. This makes it possible to inject deeper located structures with good needle visualisation. You do however need to ensure you understand the anatomy adjacent to the probe as your needle will pass through tissue that is not visualised on ultrasound.
Video 1: Demonstration of how to 'toe in' the probe to optimise needle visualisation
EXTRA ONLINE LECTURES AND TUTORIAL VIDEOS
NEEDLE VISUALISATION TUTORIALS ONLINE 24/7
All course delegates who attend our ultrasound guided injection training will get unlimited access to five tutorials on basic needle skills, like the one to the right. These will provide an excellent source of information for you to review during your learning and before the course.
- Part 1: Needle Insertion Point
- Part 2: Bevel position
- Part 3: Cross cut artefact
- Part 4: Toe in the probe
- Part 5: Angle of needle entry
")
ONLINE LECTURES 24/7
All course delegates who attend our ultrasound guided injection training will get unlimited access to five online lectures by our course tutors. These provide a more in-depth appreciation of the topics outlined below. We are constantly adding to this selection, so keep your eyes peeled!
- Needle visualisation
- Aseptic technique
- Informed consent
- Ultrasound guided injections and the evidence base
- Why we use cadaveric specimens for our guided injection training
GAIN ACCESS TO OUR PRIVATE FACEBOOK MSK ULTRASOUND COMMUNITY OF PRACTICE
By attending our courses you will also gain access to your tutors in our private, Facebook community of MSK Ultrasound practice with specific groups for upper and lower limb MSK Ultrasound pathology, discussing anonymised cases and articles of interest. We also have groups for upper and lower limb guided injection techniques, discuss your techniques - what went well, what could be improved and what the evidence is. Lastly, but importantly we have established groups on training and governance.
")
0 Comments